February, 2016
Introduction
In daily clinical practice, the fabrication of provisional restorations {hereinafter referred to as PVRs) is an important treatment step. The purpose of PVR fabrications includes: (1) protection of the pulp of the prepared tooth, (2) restoration of masticatory function (occlusion), (3) restoration of esthetics, (4) prevention of gingival tissue invasion below the gingival margin, (5) prevention of infection of the prepared tooth surface, (6) prevention of inclination of the prepared tooth, (7) prevention of movement of the prepared tooth and adjacent teeth, and (8) reduction of discomfort associated with sharp prepared tooth surfaces. On the other hand, fabrication of PVRs may also result in certain disadvantages, including the development of open contacts due to balancing-side contact, treatment interruption due to patient satisfaction with the esthetic and functional outcome, and tongue-biting caused by occlusal changes in long-term edentulous areas. Although clinicians understand both the importance of PVRs and the precautions required, few describe themselves as particularly skilled at, or fond of, fabricating them. One major reason is that conventional materials are often difficult to handle and irritating in the mouth; they generate heat during polymerization, require water cooling, and can shrink, making removal difficult. Nevertheless, whenever a tooth is prepared, a PVR must be fabricated until the final restoration is delivered. Therefore, it is crucial to use easy-to-handle materials and to master efficient fabrication techniques.
Selecting an Easy-to-Use Material: TOKUYAMA CUREGRACE™
Compared with conventional materials, TOKUYAMA CUREGRACE™ offers excellent fit, low heat generation, an added fragrance component to mask unpleasant odors, excellent handling properties including smooth mixing and easy contouring, and superior esthetics with minimal discoloration. Conventional self-curing resins generate heat and undergo polymerization shrinkage during setting. For this reason, water cooling has traditionally been required during fabrication to avoid pulpal irritation and difficulty in removal. For inexperienced dentists, managing all these factors can be challenging. The greatest advantage of this material is its low exothermicity during polymerization. This characteristic alone eliminates many of the factors that complicate provisional fabrication. lntraoral water cooling becomes unnecessary; concern regarding pulpal irritation is reduced. Furthermore, removal is generally uncomplicated unless severe undercuts are present. In addition, excellent surface quality can be achieved even when using a cross-cut bur for trimming, which helps reduce frictional heat and prevent deformation.
Preparation of Resin Dough
Next, the method for preparing the resin dough using this material is described. The resin dough is prepared by placing the LIQUID and then the POWDER into a rubber dappen dish. Whenever possible, the material should be pressed with a spatula during mixing rather than vigorously stirred. Stirring may incorporate air bubbles into the resin mixture, which can lead to discoloration and odor caused by increased surface roughness. The following cases demonstrate a fabrication method using the Dough Method and a fabrication method using a shell technique.
CASE 1: Fabrication Using the Dough Method
The patient was a 23-year-old woman with a restoration on the mandibular right second premolar (tooth #45).Chronic inflammation had developed because of an inadequate proximal contact, and replacement of the restoration was requested. Because a tongue-spike (Fig.1-1) appliance had recently been placed in the maxilla and possible occlusal changes were a concern, a PVR was planned until removal of the appliance (Fig.1-2). The existing restoration was removed (Fig.1-3), and a PVR was fabricated using the Dough Method (Fig.1-4-17). The patient reported that the taste and irritation of the resin dough were acceptable and that they felt almost no heat during polymerization. The material did not readily adhere to gloves, making fabrication easy. The junction between the resin dough and brush-applied portions blended well, and the boundary line was inconspicuous. Even when a coarse carbide bur was used for margin formation and contouring, a high-quality surface could be obtained. Polishing with a paper cone coated with petroleum jelly achieved a smooth surface with minimal effort. After approximately one and a half months, occlusal adjustment was performed, and minor intraoral contour modifications were made. Carving was easy and the adjusted surface remained smooth. After approximately two months (Fig.1-17), the PVR showed no deterioration, staining, or discoloration and continued to perform satisfactorily.
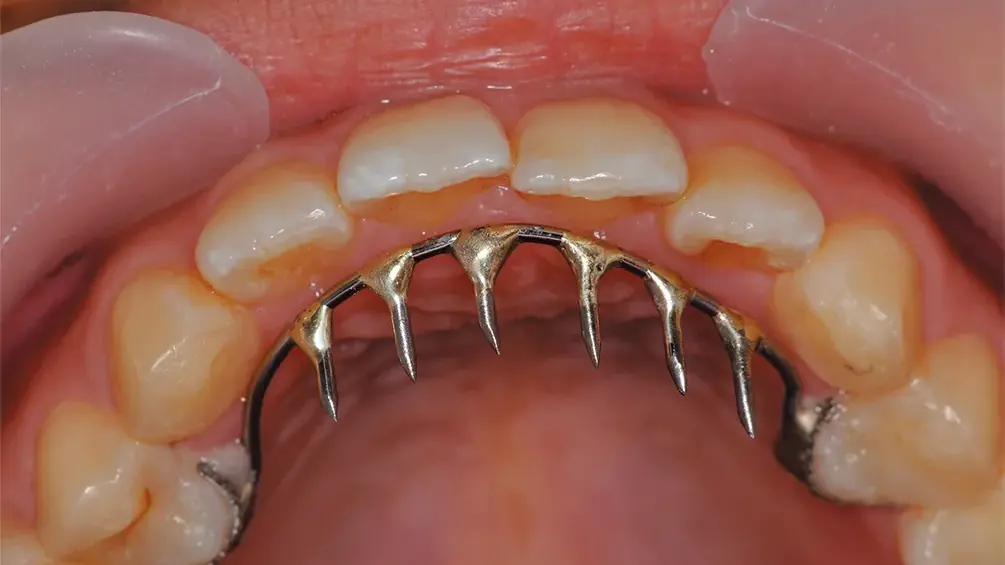
Fig. 1-1. Condition after placement of the maxillary tongue-spike appliance.
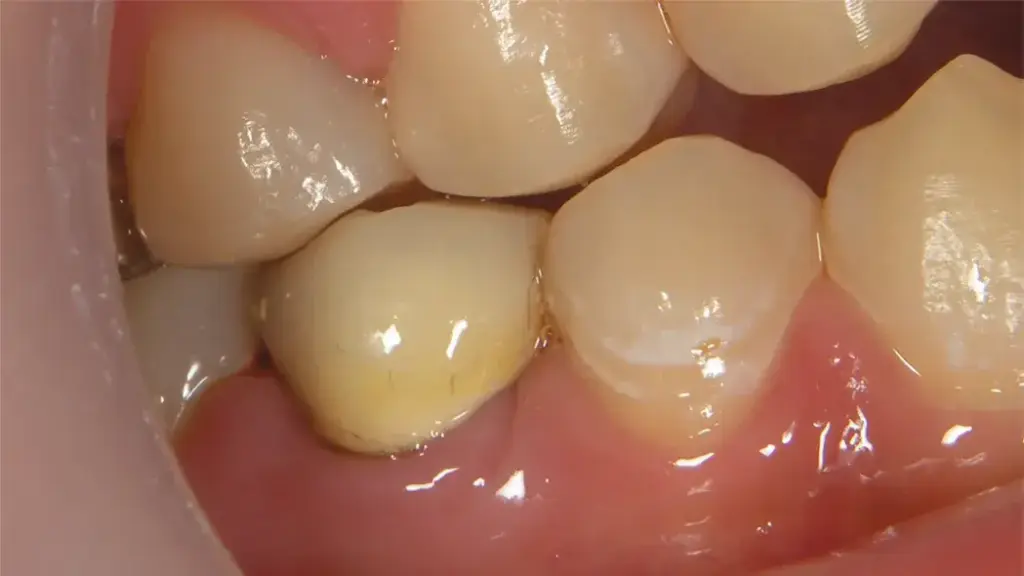
Fig. 1-2. Preoperative view of the restorations on tooth #45.
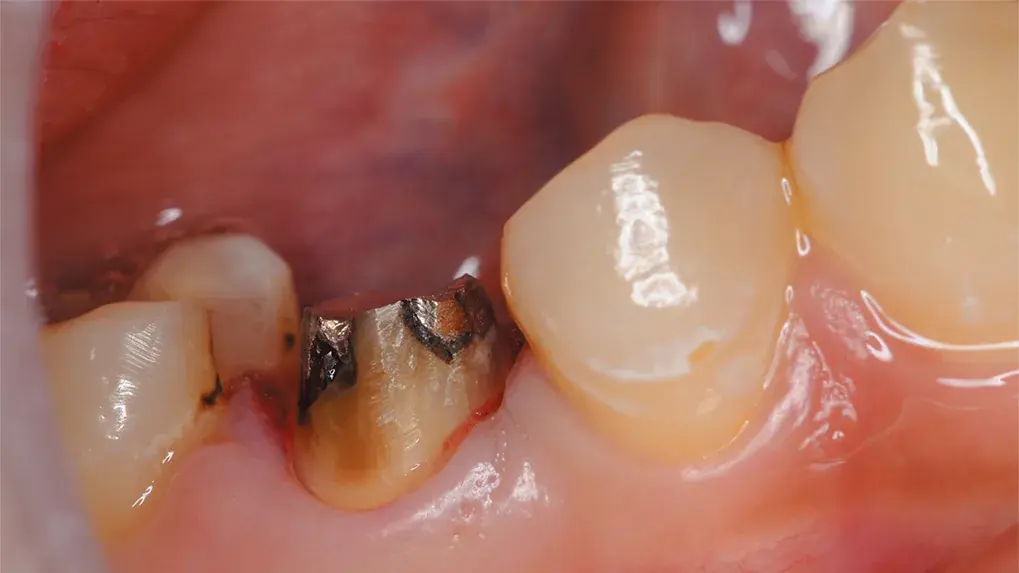
Fig. 1-3. Condition of the prepared abutment tooth #45.
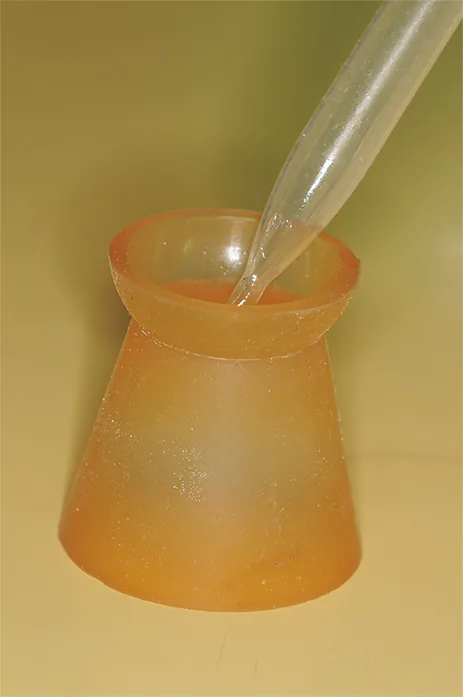
Fig. 1-4. Dispense an appropriate amount of LIQUID into a rubber dappen dish.
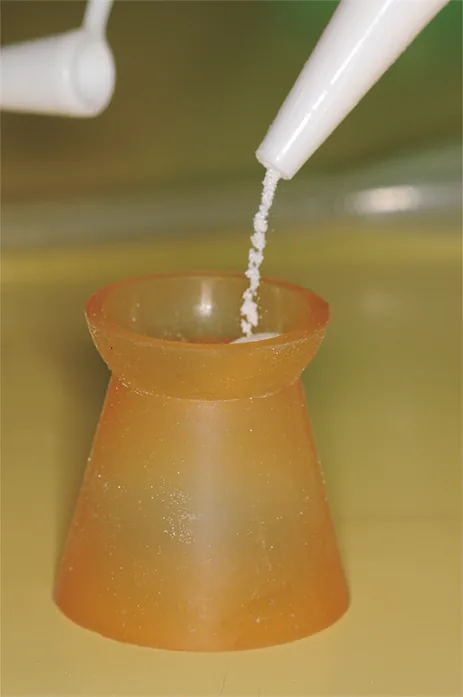
Fig. 1-5. Add the POWDER as quickly as possible.
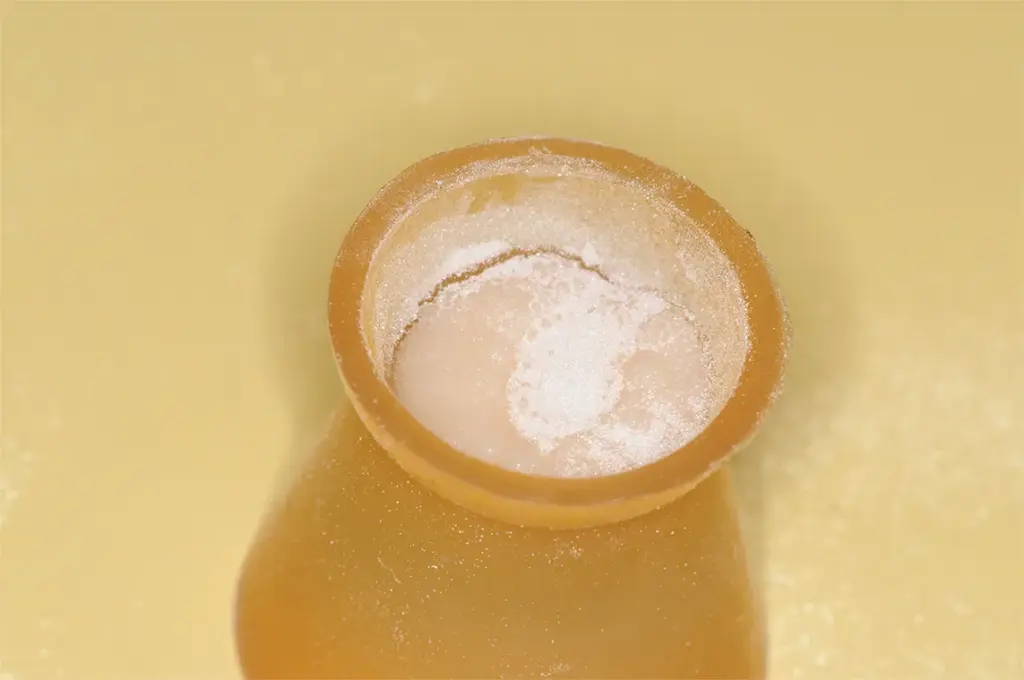
Fig. 1-6. Before mixing the POWDER and LIQUID, the mixture should appear slightly powdery; this will result in an appropriate POWDER-to-LIQUID ratio after mixing.
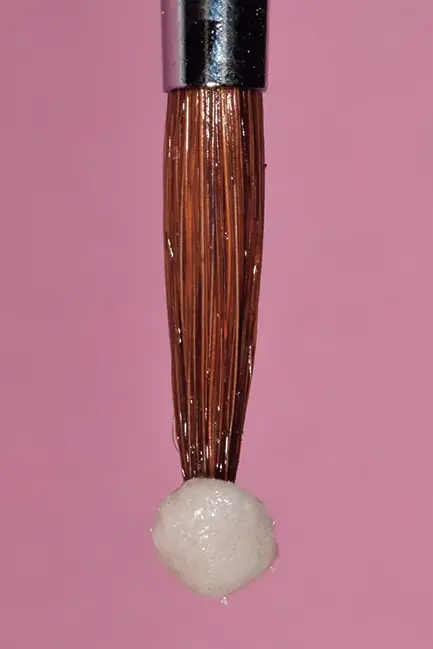
Fig. 1-7. Apply LIQUID and POWDER to the tip of a small brush to form a spherical brush-on resin increment.
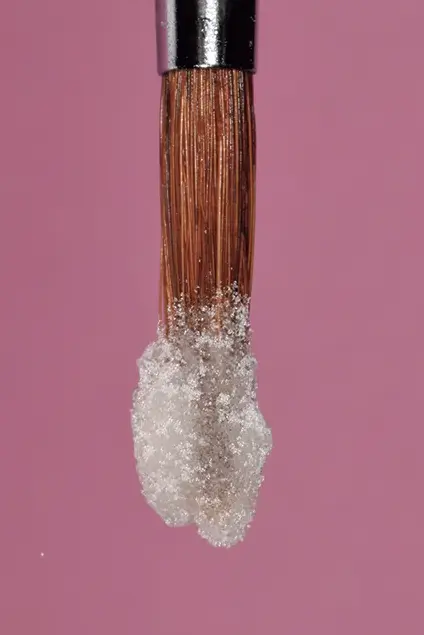
Fig. 1-8. Do not apply the material to the entire brush.
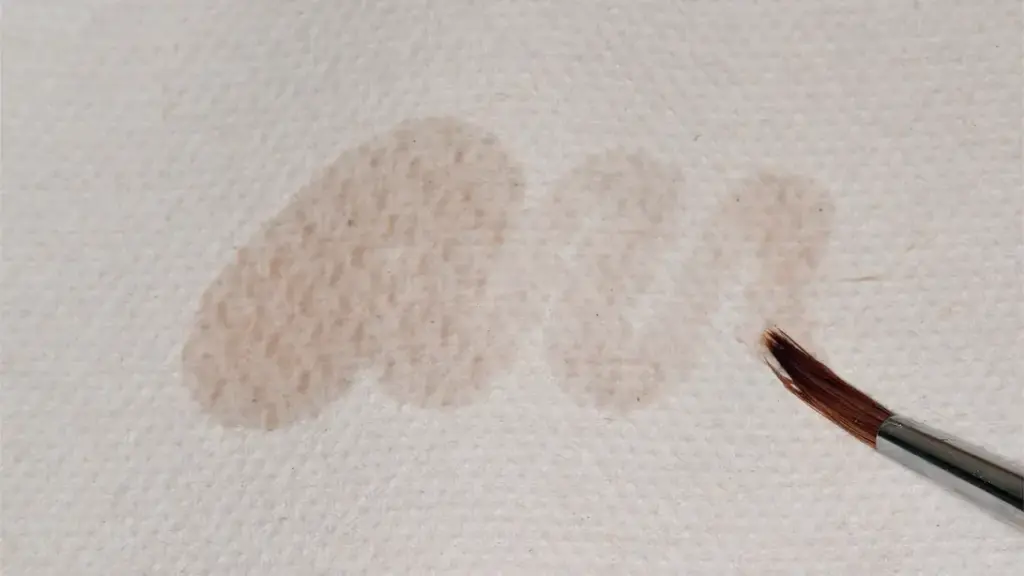
Fig. 1-9. Always keep the brush clean during the procedure.
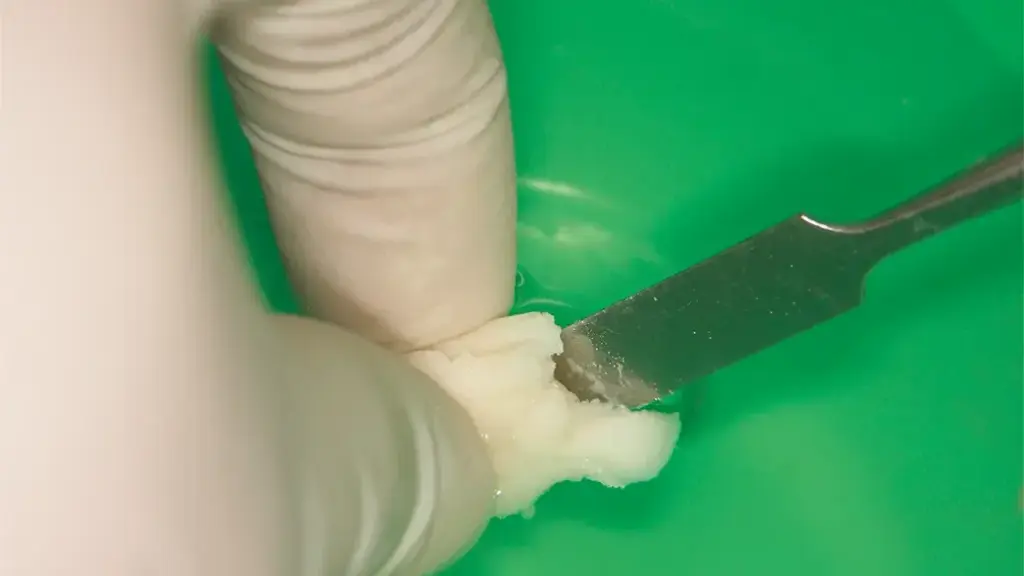
Fig. 1-10. Remove the resin dough from the spatula in a bowl of water. The water serves as a separating medium.
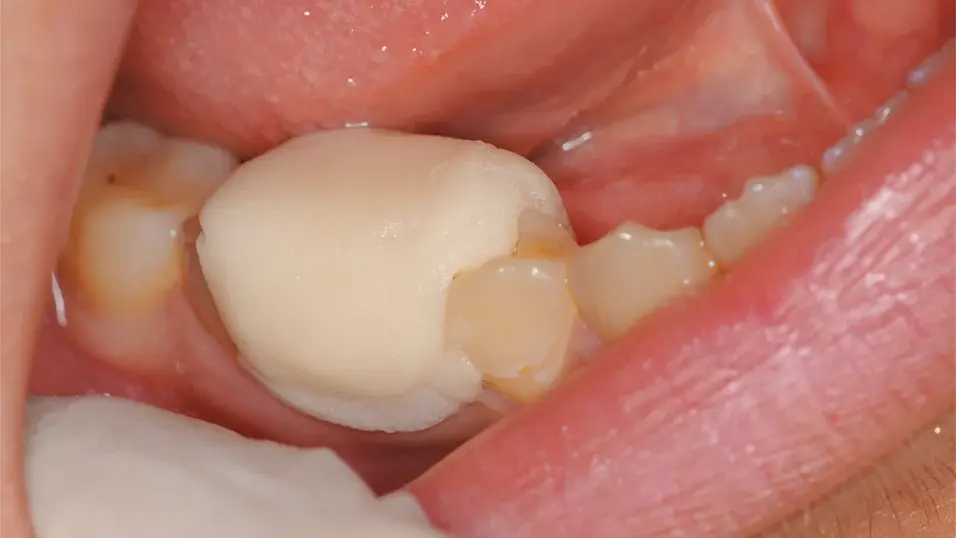
Fig. 1-11. Place the resin dough over the abutment tooth on which the brush-on resin has been applied.
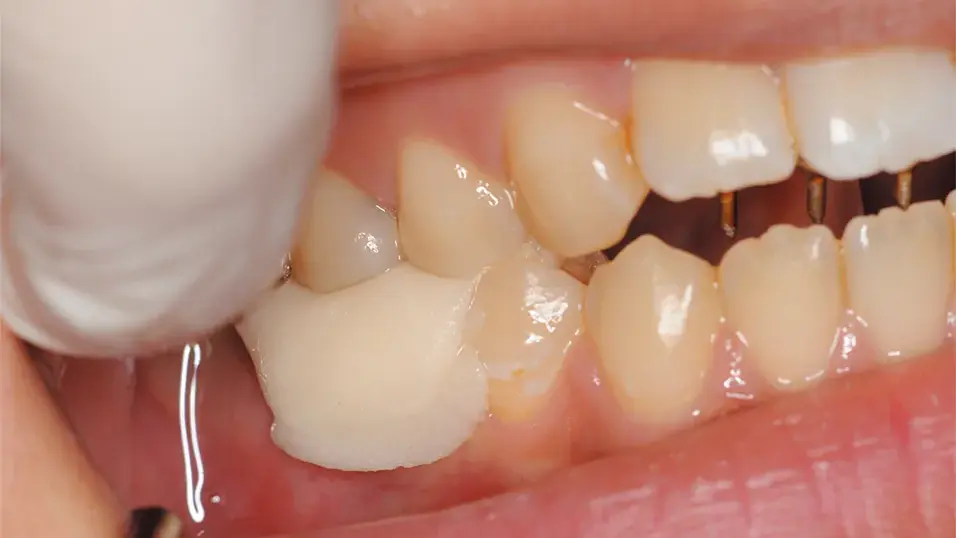
Fig. 1-12. The patient was instructed to occlude. At this stage, care must be taken to prevent the resin mass from spreading buccolingually, as this may compromise accuracy.
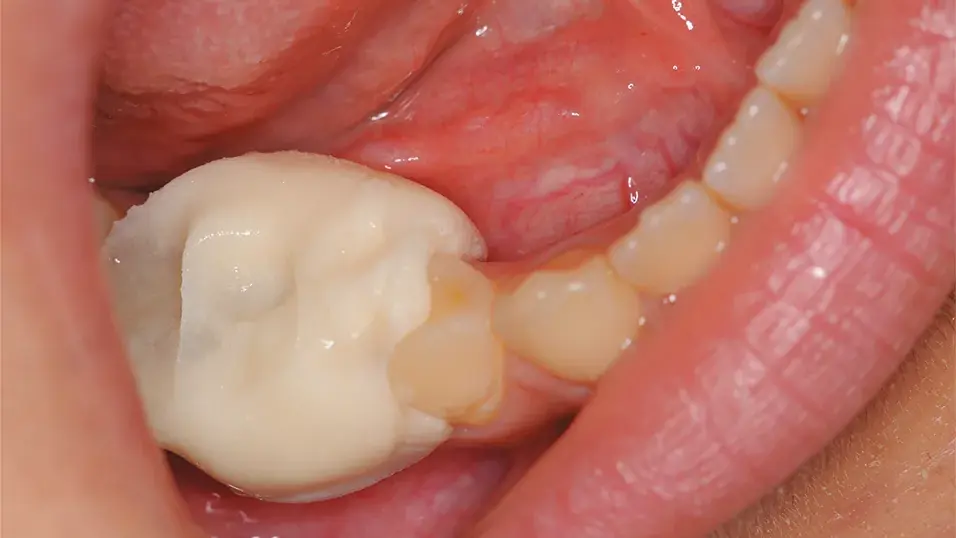
Fig. 1-13. Confirm that the PVR can be removed from the abutment tooth, then allow it to remain in place until polymerization is complete.
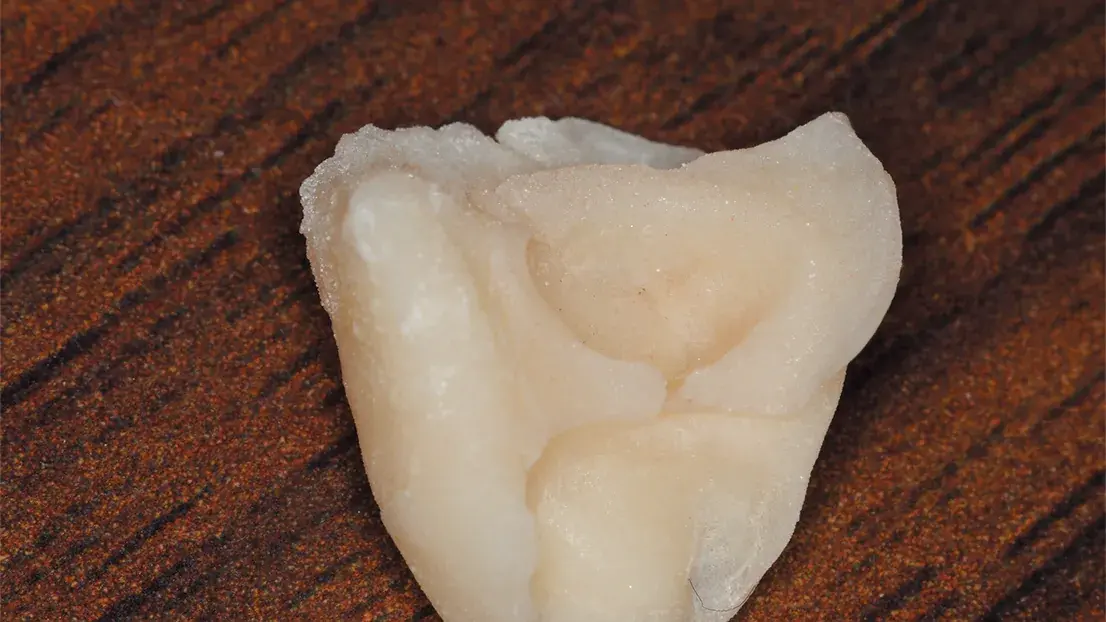
Fig. 1-14. The PVR after removal from the oral cavity.
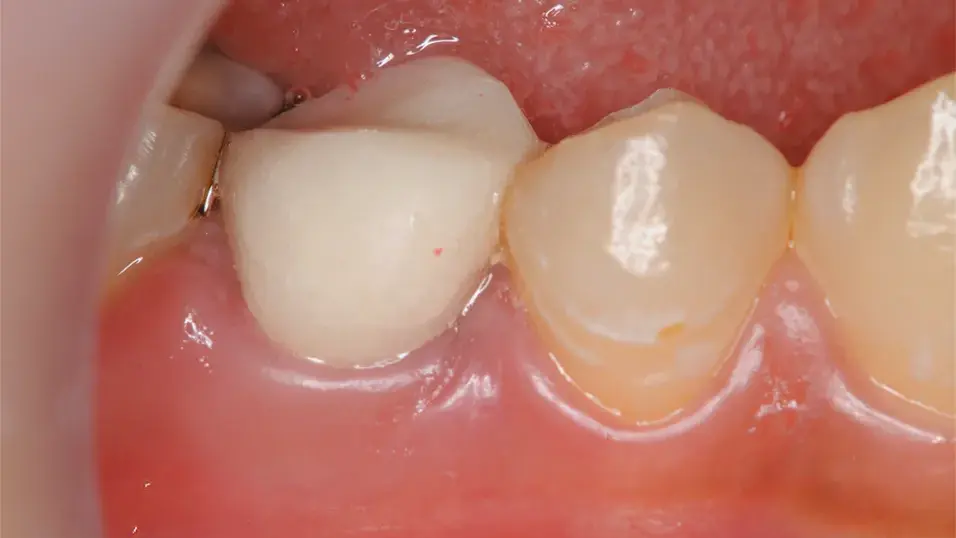
Fig. 1-15. The PVR is in place.
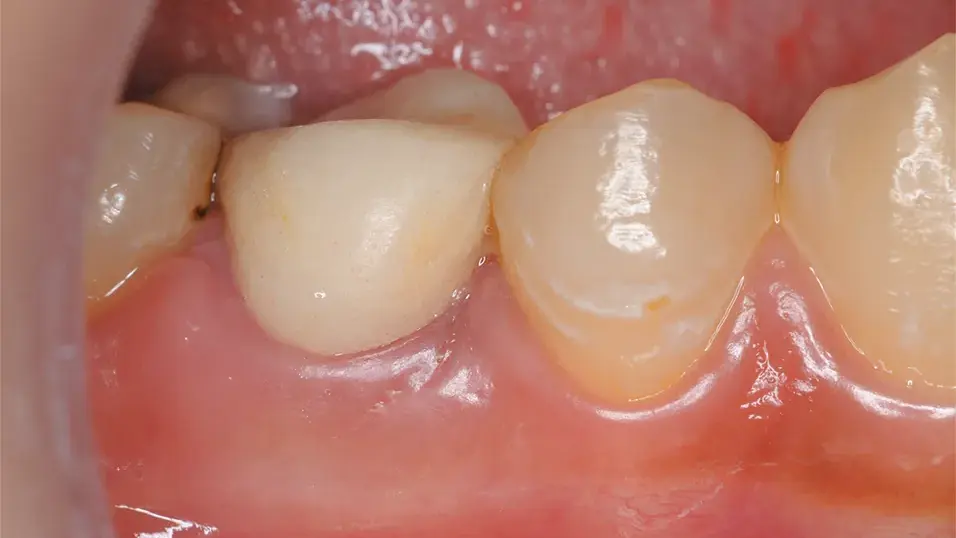
Fig. 1-16. Clinical appearance approximately 1 month after placement of the PVR.
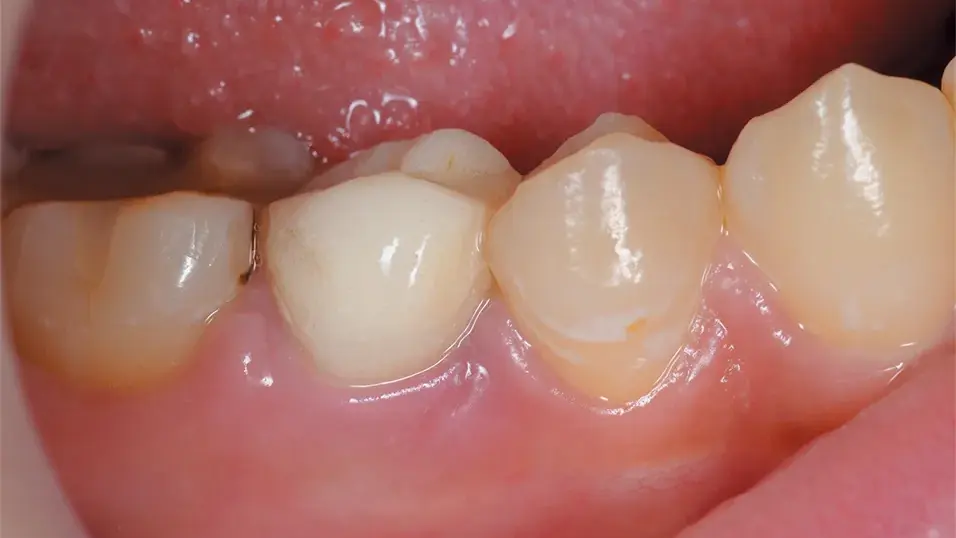
Fig. 1-17. Clinical appearance approximately 2 months after placement of the PVR.
CASE 2: Fabrication Using a Shell Technique
The patient was a 27-year-old woman who previously had root canal treatment and had a metal crown placed on the mandibular left second premolar (tooth #35). She later requested esthetic treatment because she became concerned about the appearance of the metal restoration. After removal of the metal crown, a PVR was fabricated using a shell technique. The margin was refined subgingivally, and impressions and bite registration were obtained. Subsequently, the patient requested tooth whitening, so treatment proceeded while leaving the PVR in place. Scheduling conflicts prolonged the whitening treatment by several months, keeping the PVR in service much longer than originally planned. Despite the subgingival margin placement, no inflammation occurred and the treatment progressed favorably until placement of the final restoration. Although PVRs are typically worn for only a few weeks to avoid degradation and tissue irritation, in this case, the device remained in place for approximately four and a half months. Despite this extended duration, the PVR showed no signs of discoloration, cracking, roughness or odor and the patient reported no discomfort.
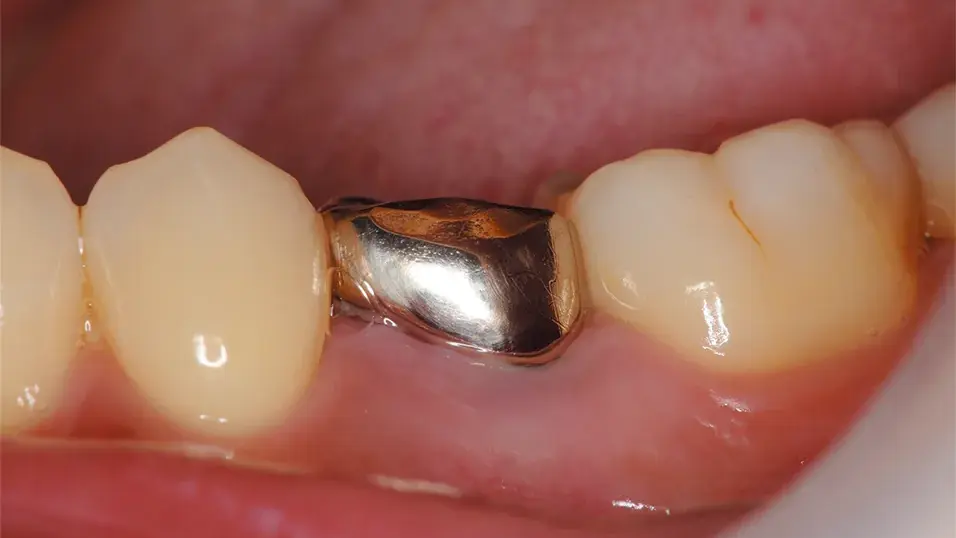
Fig. 2-1. Preoperative condition of tooth #35.
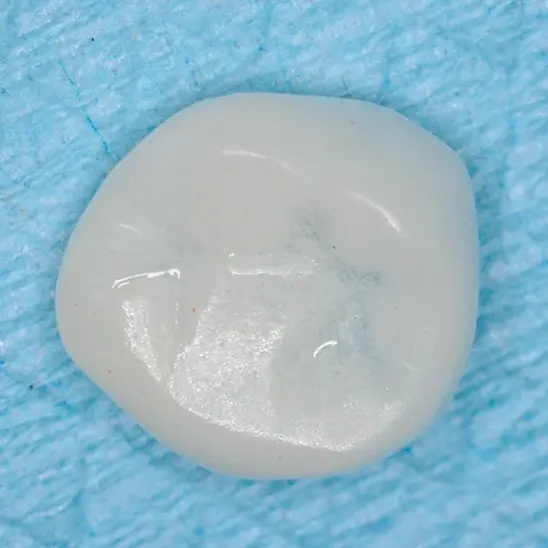
Fig. 2-2. Shell restoration.
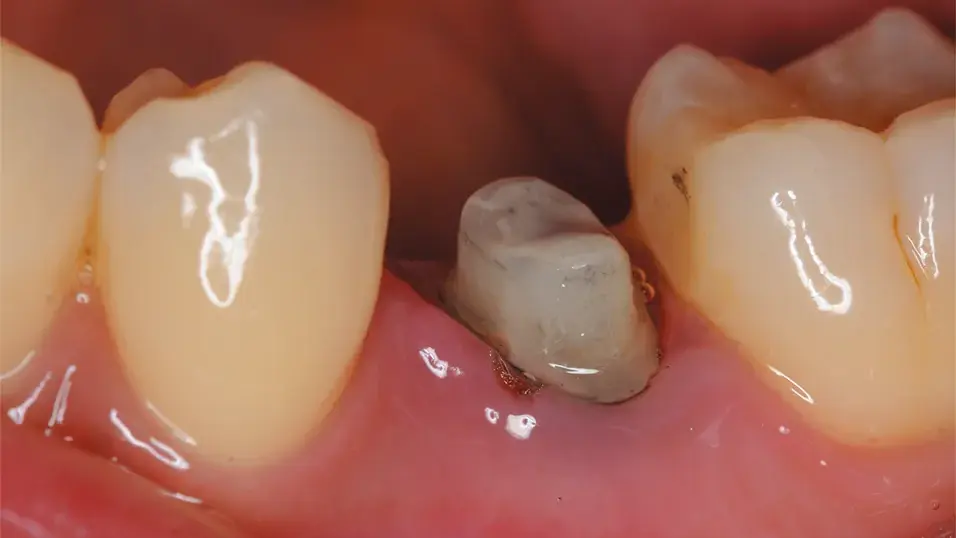
Fig. 2-3. Condition of the abutment tooth prepared with a supragingival finish line.
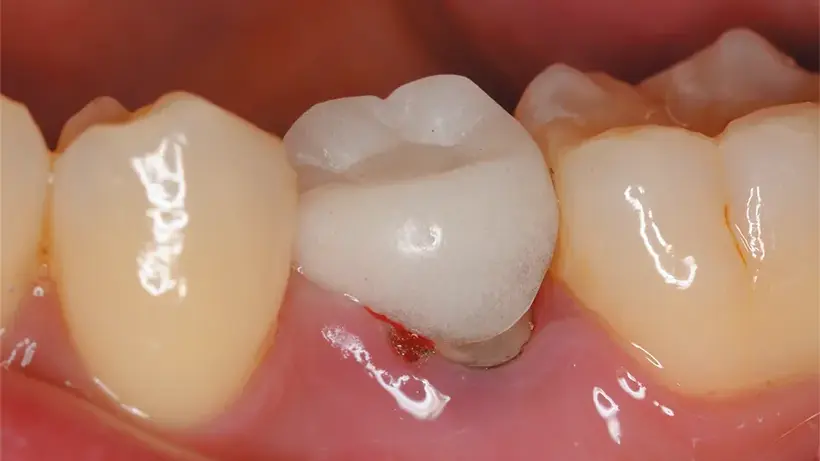
Fig. 2-4. Shell seated intraorally.
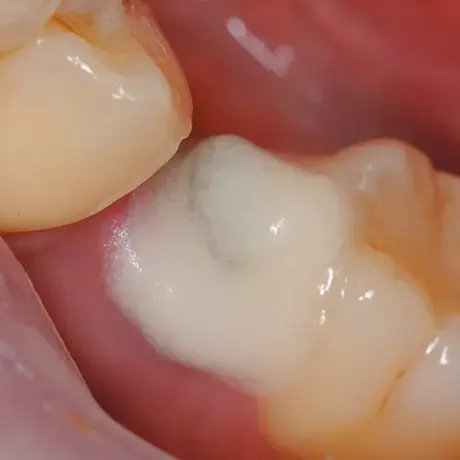
Fig. 2-5. Brush-built resin applied to the abutment tooth.
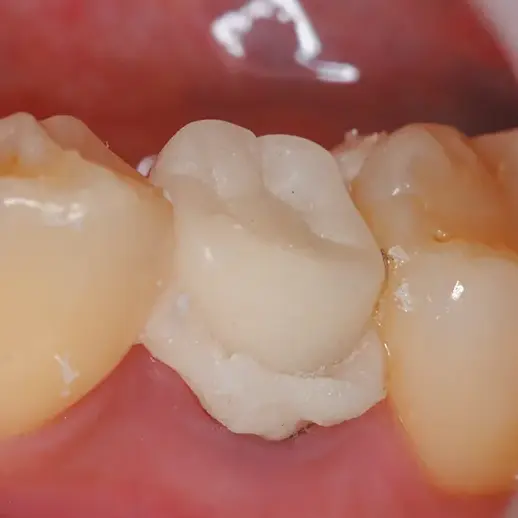
Fig. 2-6. Brush-built resin was applied to the intaglio surface of the shell, and the shell was seated on the abutment tooth.
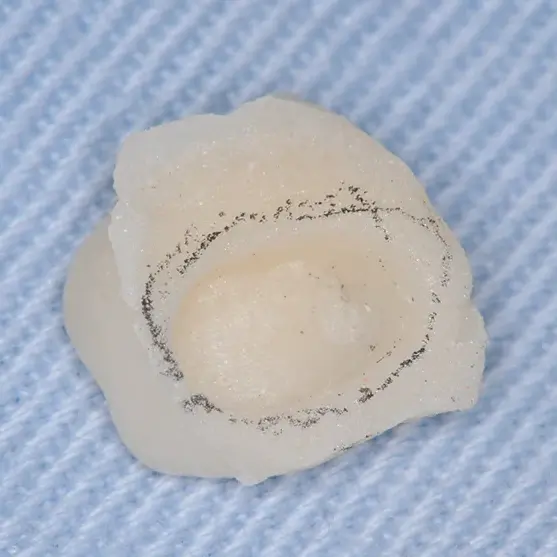
Fig. 2-7. Condition after removal of the PVR from the oral cavity.
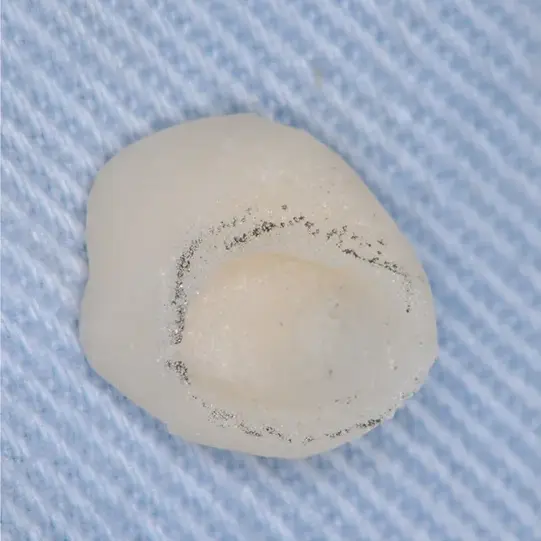
Fig. 2-8. Condition after margin trimming and contouring.
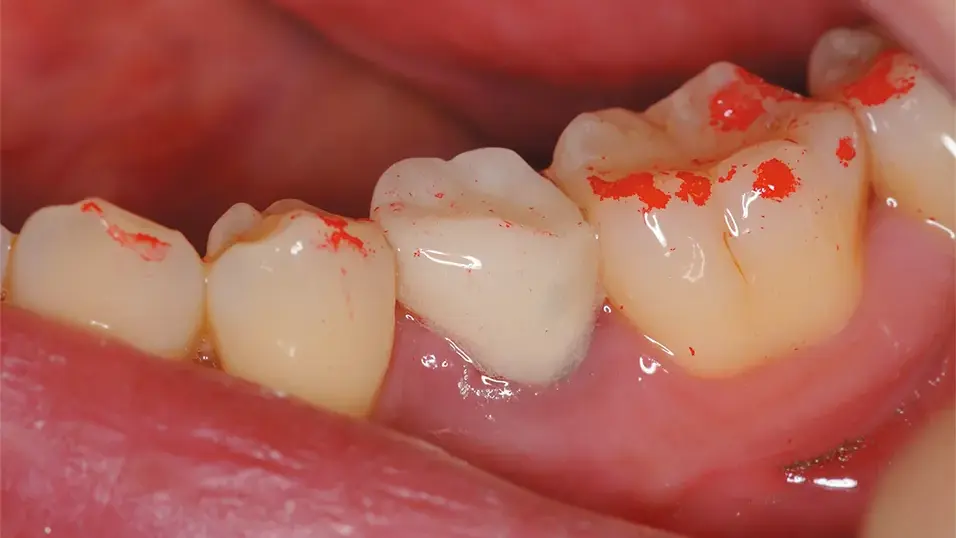
Fig. 2-9. Condition after removal of the temporarily seated PVR.
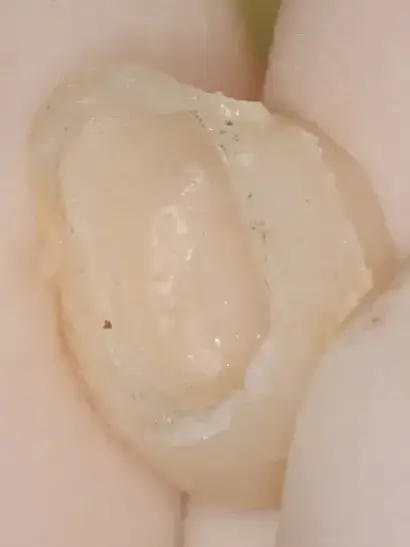
Fig. 2-10. Condition after removal of the PVR at the time of impression making for the porcelain-fused-to-metal crown (margin located supragingivally).
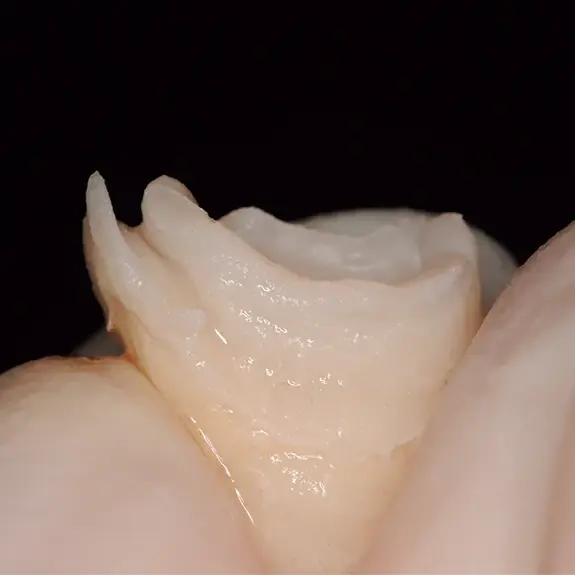
Fig. 2-11. After completion of subgingival (epithelial attachment level) tooth preparation and washing of the provisional restoration. The margin placed approximately 1 mm below the gingival margin is accurately reproduced.
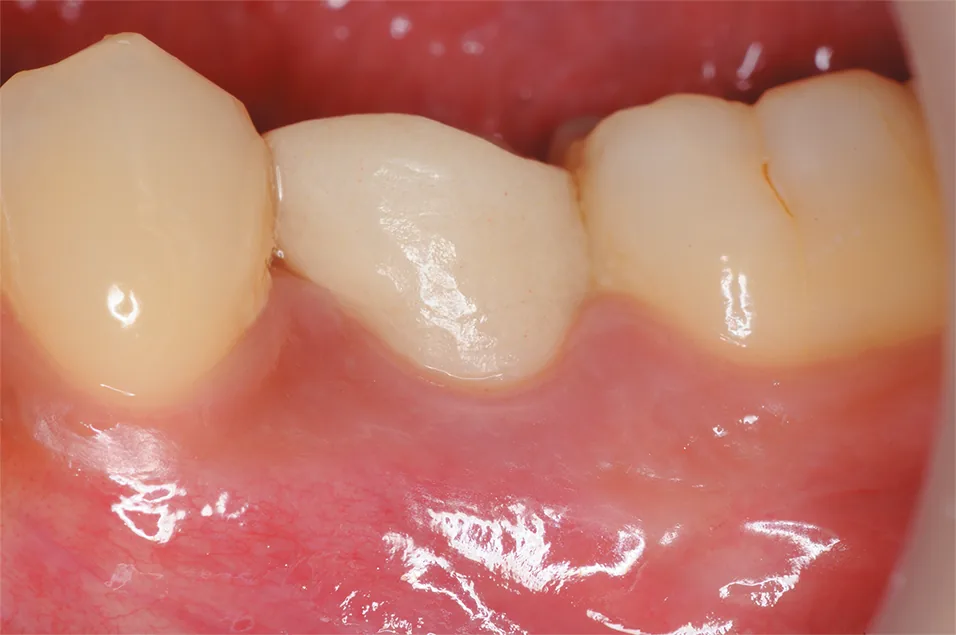
Fig. 2-12, Fig. 2-13. Buccal view and occlusal view 4 months after placement of the PVR.
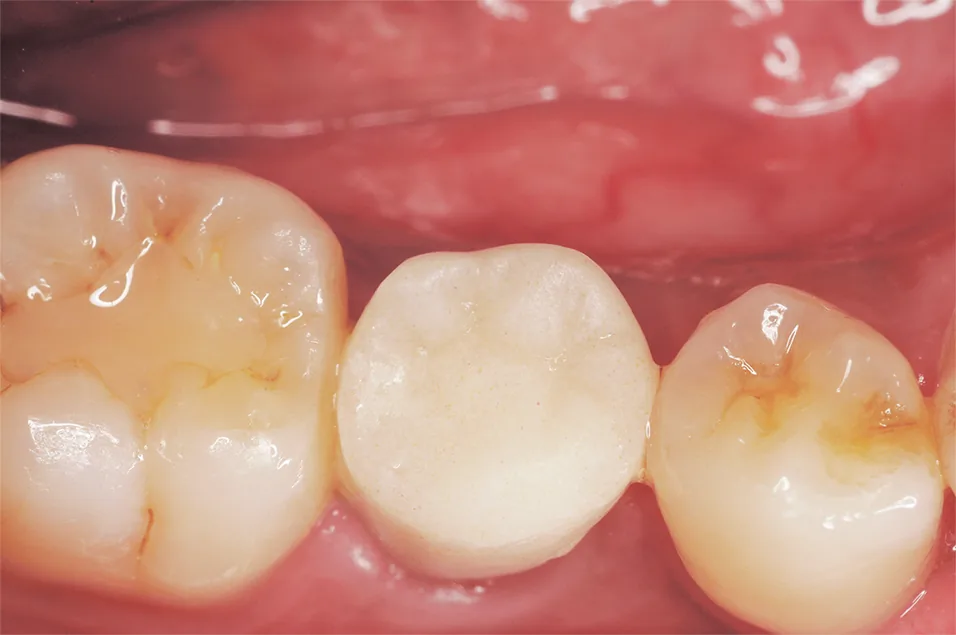
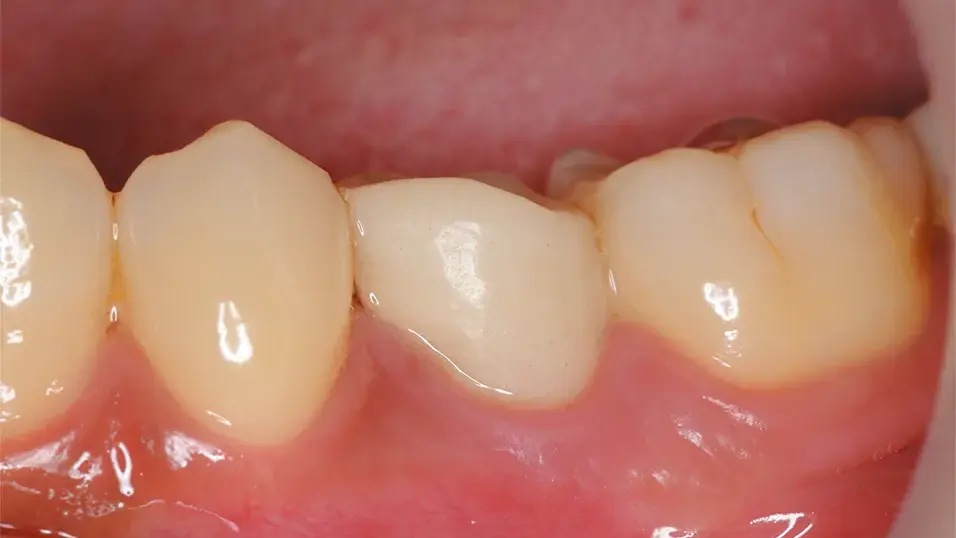
Fig. 2-14. Condition approximately 4.5 months after placement of the PVR.
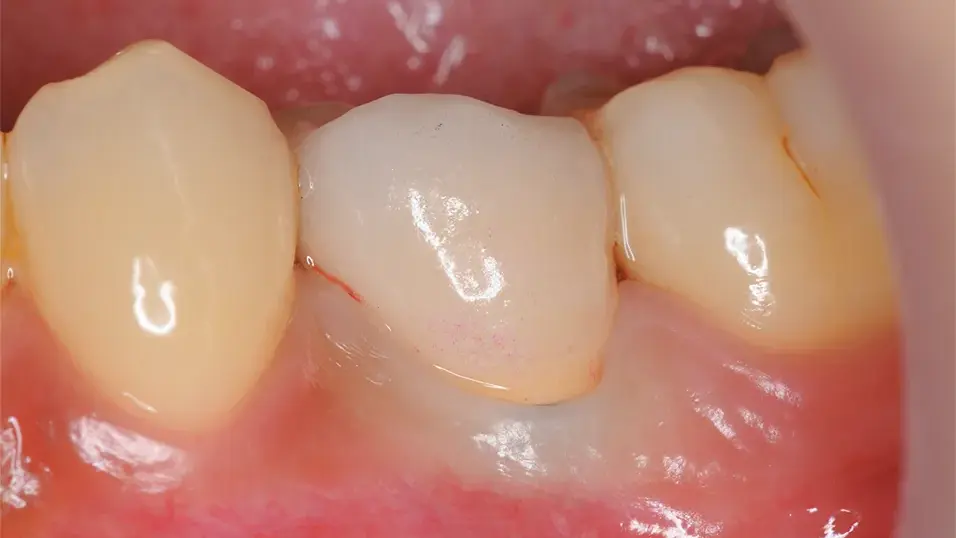
Fig. 2-15. Porcelain-fused-to-metal crown seated.
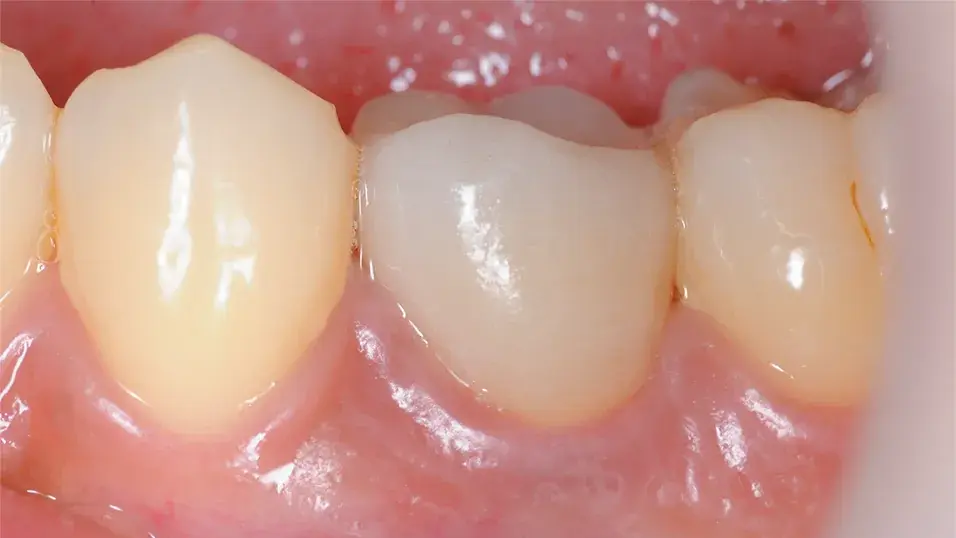
Fig. 2-16. Condition approximately I month after placement of the porcelain-fused-to-metal crown.
Conclusion
Naturally, PVR represents an intermediate stage of clinical treatment. Although clinicians often record preoperative and postoperative conditions, relatively few clinicians routinely record the condition of PVRs. Although the importance of PVRs is well recognized, they tend to play a supporting role compared with the final restoration. Because fabrication can be time-consuming, clinicians may be reluctant to perform it. In a seminar on provisional materials, many dentists reported that fabrication of a PVR required approximately 30 minutes. TOKUYAMA CUREGRACE™ not only offers excellent material properties compared with conventional products, but is also exceptionally easy to handle during fabrication of PVRs. Its use may make fabrication easier and more enjoyable. Let us make PVRs a routine part of daily practice!
This clinical case report contains translated excerpts from an article published in Dental Outlook (Shikai-Tembo), Vol. 127, No. 2, February 2016, pp. 362-368.